Applications & Organizations
Manage applications, switch between contexts, and configure organization settings
In kiteto, you can manage multiple applications and members within an organization. Use the app selector in the sidebar to quickly switch between applications, create new applications, and access your organization's settings.
The App Selector
The app selector is located at the top of the left sidebar and always displays the currently selected organization and active application. Clicking on this area opens a dropdown menu with all available applications in your organization as well as additional management options.
The dropdown contains:
- Organization name as the heading
- Settings button (gear icon) - opens organization settings
- List of all applications in the organization, each with an "Edit" button
- "Add Application" button at the bottom of the menu
Adding a New Application
-
Click on the app selector to open the dropdown menu
-
Click "Add Application" at the bottom of the menu
-
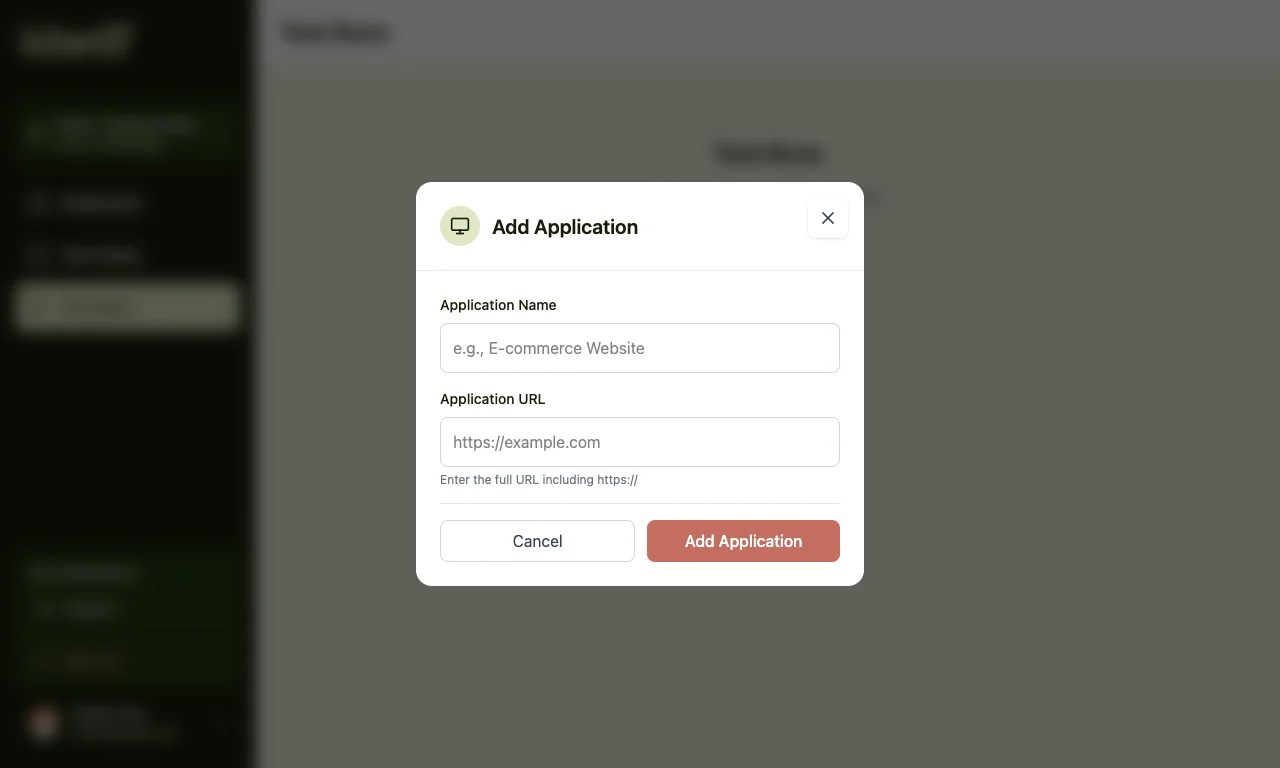
A dialog opens with the following fields:
- Application Name - Enter a meaningful name for your application (e.g., "E-commerce Website")
- Application URL - Enter the complete URL of your application (e.g.,
https://example.com)
Note
Enter the complete URL including
https:// -
Click "Add Application" to save the application, or "Cancel" to abort
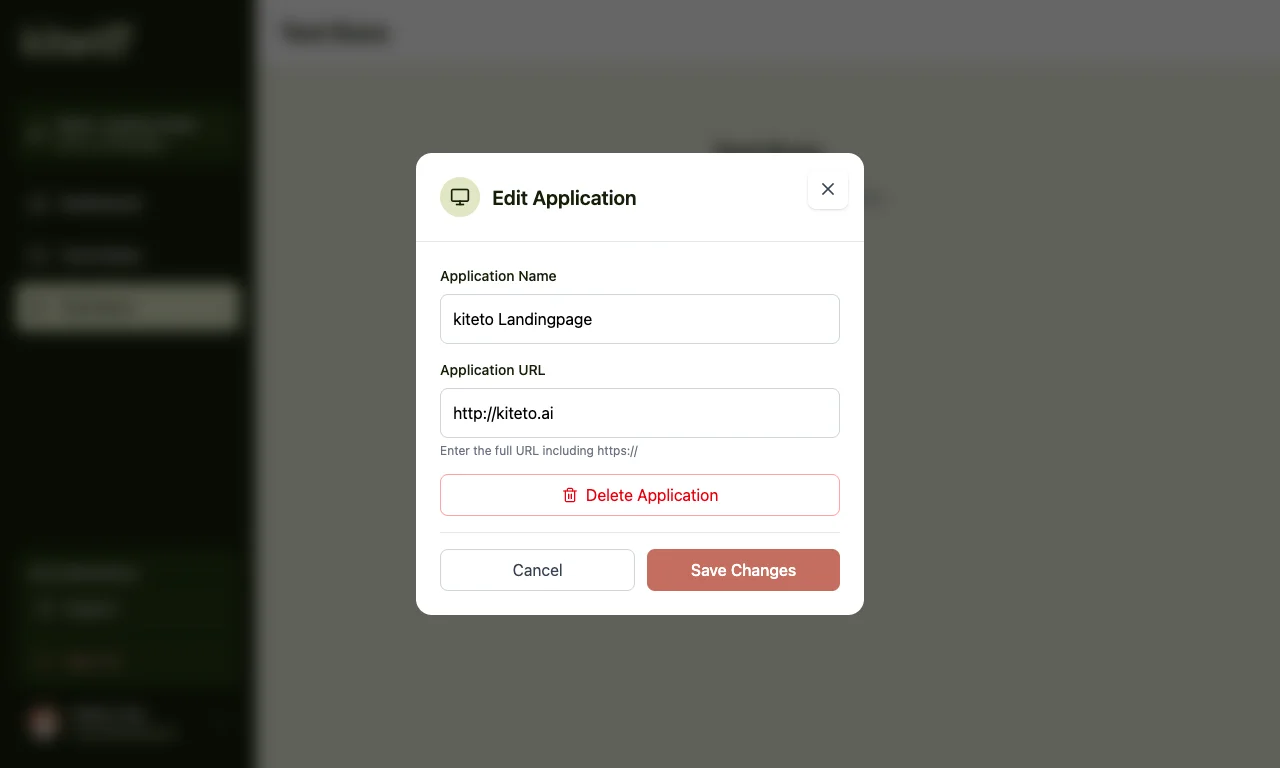
Editing an Application
You can adjust the name and URL of an existing application at any time, or delete an application.
-
Click on the app selector to open the dropdown menu
-
Click the "Edit" button next to the desired application
-
The edit dialog opens with the current values pre-filled:
- Application Name - Adjust the name of the application
- Application URL - Update the URL of the application
-
Click "Save Changes" to save your changes, or "Cancel" to abort
Deleting an Application
Warning
Deleting an application cannot be undone. All associated tests and data will be lost.
- Open the edit dialog for the desired application (see above)
- Click the red "Delete Application" button
- Confirm the deletion
Organization Settings
You can access the organization settings via the gear icon in the app selector dropdown. The dialog is divided into two tabs: General and Members.
"General" Tab - General Settings
In the "General" tab, you can manage your organization's profile.
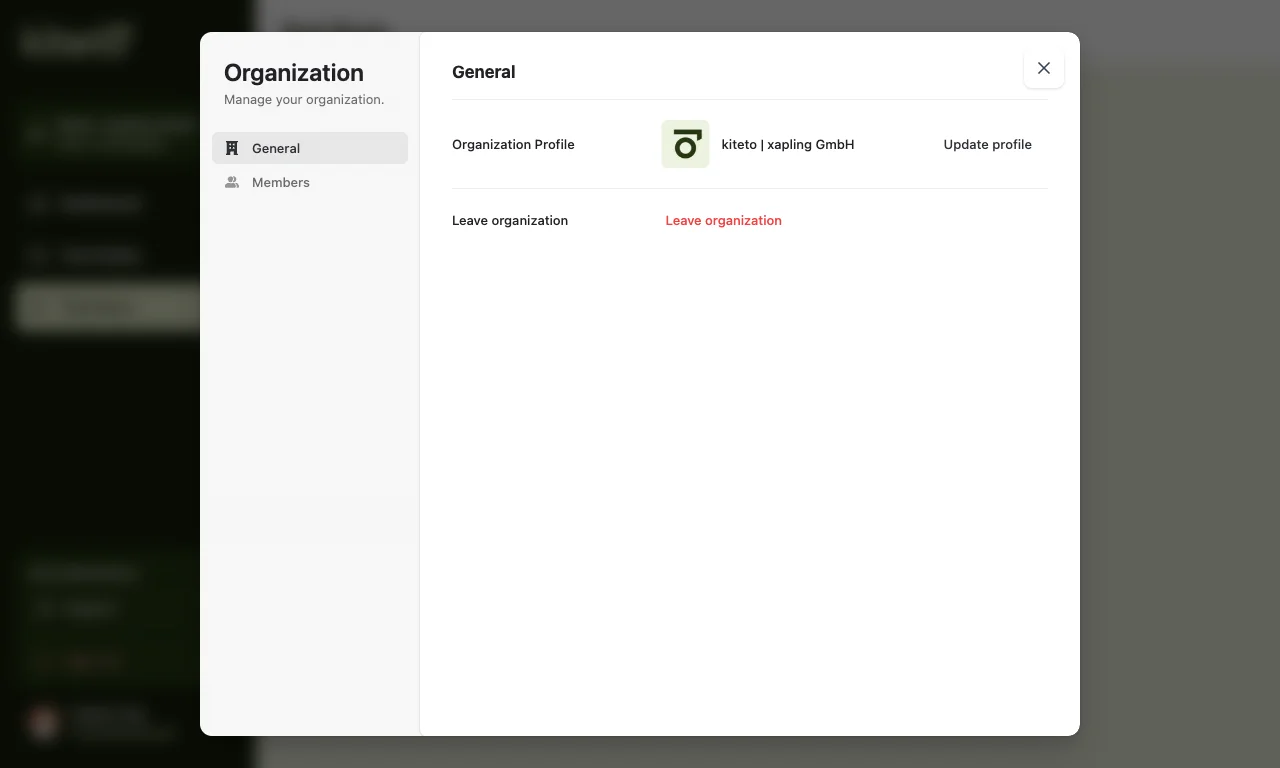
- Organization logo - Displays the current organization logo
- Organization name - Displays the current name (e.g., "kiteto | xapling GmbH")
- "Update profile" - Saves changes to the organization profile
Warning
The "Leave organization" button allows you to leave the organization. This action cannot be undone. Use this option only if you are certain you want to leave the organization.
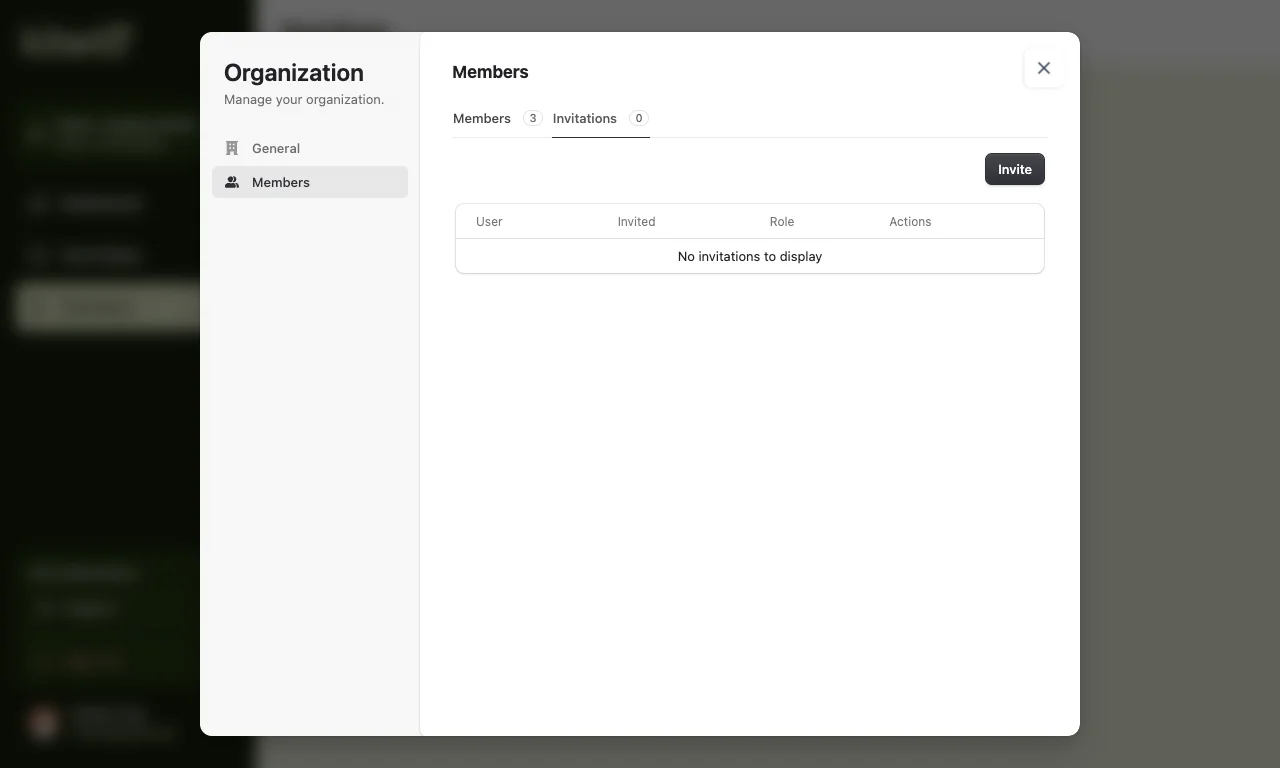
"Members" Tab - Managing Members
In the "Members" tab, you can see all people who have access to your organization and invite new members.
The member table displays the following information:
| Column | Description |
|---|---|
| User | Name and email address of the member |
| Joined | Date the member joined the organization |
| Role | Member's role (e.g., "Admin") |
| Actions | Available actions for the respective member |
Your own account is marked in the list with "You".
Searching for Members
Use the search field above the table to search for a specific member.
Inviting New Members
- In the "Members" tab, click the "Invite" button
- Enter the email address of the person you want to invite
- Send the invitation
The invited person will receive an email with an invitation link and will subsequently appear in the "Invitations" tab until the invitation has been accepted.
"Invitations" Tab - Pending Invitations
In the "Invitations" tab, you can see all pending invitations. As long as no invitations are open, the message "No invitations to display" is shown.